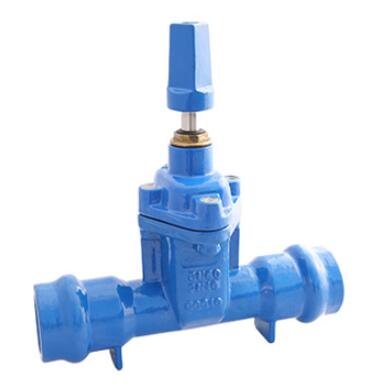
Installing a gate valve can be a straightforward task if you follow the correct steps. Gate valves are essential for controlling the flow of liquids in various plumbing systems, offering reliable shut-off capabilities. This step-by-step guide will walk you through the process of installing a gate valve efficiently and correctly.
Gather the Necessary Tools and Materials
Before starting the installation, ensure you have all the necessary tools and materials. You will need a gate valve, pipe cutter, pipe wrench, Teflon tape, pipe cleaner, and appropriate fittings. Having everything on hand will make the installation process smoother and more efficient.
Shut Off the Water Supply
The first crucial step is to shut off the water supply to the area where you will be installing the gate valve. Locate the main water shut-off valve and turn it off. Open a faucet nearby to drain any remaining water from the pipes, ensuring the work area is dry.
Cut the Pipe
Next, identify the section of the pipe where you will install the gate valve. Use a pipe cutter to make a clean, straight cut on the pipe. Ensure the cut is precise, as uneven cuts can lead to leaks. Measure and mark the exact spot before cutting to avoid any mistakes.
Clean the Pipe Ends
Once the pipe is cut, clean the ends thoroughly using a pipe cleaner. Remove any burrs, debris, or rough edges that might interfere with the fitting. Cleaning the pipe ends ensures a secure and leak-free connection for the gate valve.
Apply Teflon Tape
Take the Teflon tape and wrap it around the threads of the pipe ends. Teflon tape helps create a tight seal and prevents leaks. Wrap the tape in the direction of the threads to ensure it stays in place during the installation.
Attach the Gate Valve
Position the gate valve between the two pipe ends. Ensure the valve is oriented correctly, with the handle in an accessible position. Use a pipe wrench to tighten the valve onto the pipe ends securely. Be careful not to overtighten, as this can damage the threads or the valve itself.
Check for Leaks
After the gate valve is securely in place, turn on the water supply gradually. Check the connections and the valve itself for any signs of leaks. If you notice any leaks, tighten the connections slightly until the leaks stop. Ensure the gate valve operates smoothly by turning it on and off a few times.
Test the Valve
Once you are confident there are no leaks, test the gate valve to ensure it functions properly. Open and close the valve several times to check for smooth operation and full shut-off capabilities. Proper testing ensures the valve will perform reliably when needed.
Final Adjustments
Make any final adjustments to the valve or connections as necessary. Ensure the valve is easily accessible for future maintenance or operation. Double-check that all connections are secure and there are no leaks.
Conclusion
Installing a gate valve can be a straightforward task if you follow these steps carefully. Proper installation ensures reliable performance and prevents potential leaks in your plumbing system.
For additional assistance or to find high-quality gate valves, feel free to contact us. As a trusted supplier, we can provide the right products and guidance to ensure your installation is successful.


